Friday, July 1, 2016

JavaScript Picture Gallery for Sharepoint


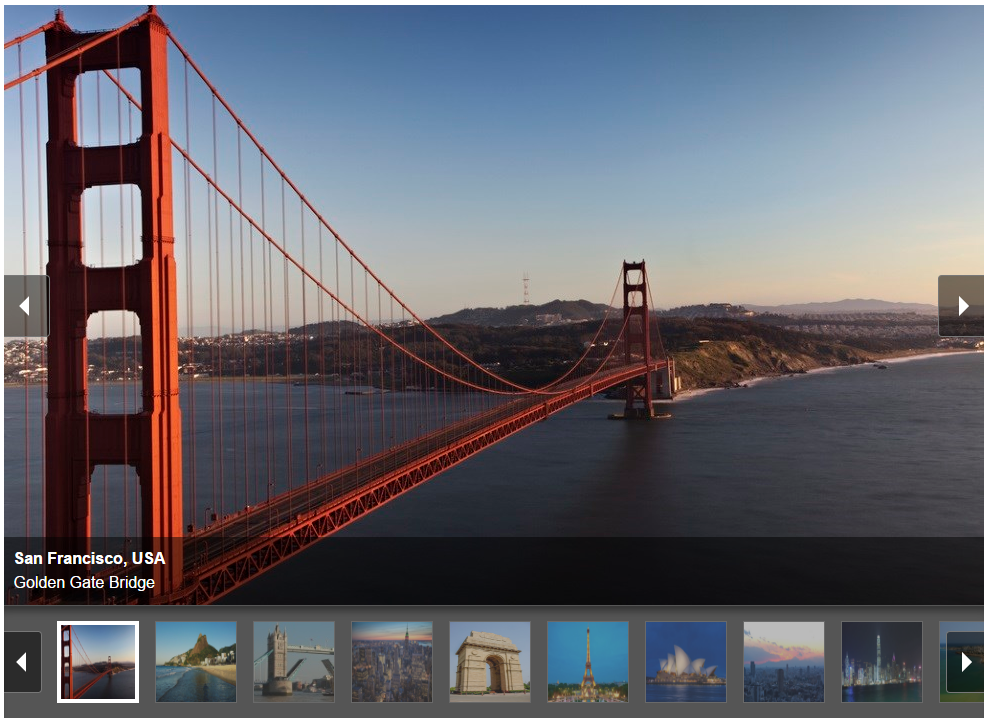
As user always demanding for better look and feel, I was searching right JavaScript gallery to make my users happier. Finally I found one of best JavaScript Gallery sample here PgwSlideshow which look amazing and lighter as well. So now I am showing you how to connect PgwSlideshowto SharePoint Picture Library.


Step 1
Create a Sharepoint Library or List Ex: MyPicLibrary (In my case, I used List. because I could just enter the URL there)
Create three List Columns Ex: "Title, Description, URL" and enter some items.

Step 2
Download PgwSlideshow , SpServices and jQuery  (or you can use there CDN)

Step 3
Copy below code to NotePad and save it to Document Library. after that connect to QEWP.

<script type="text/javascript" src="/jQuery/jquery-1.12.3.min.js"></script>
<script type="text/javascript" src="/jQuery/jquery.SPServices-2014.02.min.js"></script>
<script type="text/javascript" src="/jQuery/PgwSlideshow/pgwslideshow.min.js"></SCRIPT>
<link rel="stylesheet" href="/jQuery/PgwSlideshow/pgwslideshow.min.css" />
<link rel="stylesheet" href="/jQuery/PgwSlideshow/pgwslideshow_light.min.css" />

<script language="javascript" type="text/javascript">


$(document).ready(function() {

  $().SPServices({
    operation: "GetListItems",
    async: false,
    listName: "MyPicLibrary ",
CAMLRowLimit: 50,
    CAMLViewFields: "<ViewFields></ViewFields>",
completefunc: function (xData, Status) {
      $(xData.responseXML).SPFilterNode("z:row").each(function() {
var Title  = $(this).attr("ows_Title");  
var Decription  = $(this).attr("ows_Description");  
var URL  = $(this).attr("ows_URL"); 

var str = string.substring(0, string.length-2);

        var liHtml = "<li><img src='"+ URL +"'" + " " + "alt='"+ Title +"'" + " " + "data-description='"+ Decription +"'  />"  + "</li>";

        $("#tasksUL").append(liHtml);
      });
    }
  });
});
</script>
<ul id="tasksUL" class="pgwSlideshow"/>

<SCRIPT type=text/javascript>

$(document).ready(function() {
    $('.pgwSlideshow').pgwSlideshow();
});
</script>

Enjoy it. 

Simple Fast Search box for SharePoint

Today I am going to show you simple but very fast Search option for your SharePoint List/Document library. Probably you need this type of search option when user bagging and having trouble with SharePoint build search options.


Step 1
Open your SharePoint List and edit it.

Step 2
Add CEWP (Content Editor Web part) and copy paste bellow code. (or save below code to text file and upload to Document library. after that connect to QEWP)

<script type="text/javascript" src="https://code.jquery.com/jquery-2.2.4.js"></script>
<script>
jQuery.expr[':'].Contains = function(a,i,m){return (a.textContent || a.innerText || "").toUpperCase().indexOf(m[3].toUpperCase())>=0;};

$(document).ready(function(){


    var webPartID = $("#WebPartWPQ2");


    $(webPartID).prepend('<div style="padding: 2px; border: 1px solid rgb(204, 204, 204); margin: 5px auto 0pt; background: #ccc; display: block;"><h3 style="text-align: center;margin:2px;">Instant search: <input type="text" class="search" style="padding: 5px;"/></h3></div>');


        $("input.search").change(function() {

            var txt = $("input.search").val();
            if (txt) {
                $(webPartID).find("td:not(:Contains("+txt+"))").parent("tr.ms-itmhover").hide();
                $(webPartID).find("td:Contains("+txt+")").parent("tr.ms-itmhover").show();
            } else {
                $(webPartID).find("td").parent("tr.ms-itmhover").show();
            }
        }).keyup(function(){$(this).change();
    })
});
</script>


Monday, June 13, 2016

JavaScript Video Gallery

As User request, I was searching how to make video gallery which able to connect to SharePoint List. finally I found beautiful JavaScript Video Gallery call UniteGallery that more than enough for what I expected. Herewith Easy way to make your portal look beautiful. I used SPServices to retrieve data from SharePoint List


1. Download jQuery UniteGallery and SPservices (Create a Document Library and upload it)

2. Create Custom list call "VideoList" (you can name it as you wish but make sure mention in bellow Script)
Create 5 Columns: Title, Description, Link, Image1, Image2


Title : For Your Video Title
Description : Enter Description of Video
Link : Link of You Tube or Vimeo (you just enter Video code)
Image1 : This is the Thumbnail image for Video List
Image2 : This is the Thumbnail Image for View


3. Here is the JavaScript Code ( Save as TXT file it to Document Library and attach it to CEWP )

<script type="text/javascript" src="../YourSite/jQuery/jquery-1.12.3.min.js"></script>
<script type="text/javascript" src="../YourSite/jQuery/jquery.SPServices-2014.02.min.js"></script>
<script type="text/javascript" src="../YourSite/jQuery/unitegallery/unitegallery.js"></SCRIPT>
<script type="text/javascript" src="../YourSite/jQuery/unitegallery/ug-theme-video.js"></SCRIPT>
<link rel="stylesheet" href="../YourSite/jQuery/unitegallery/unite-gallery.css" />
<link rel="stylesheet" href="../YourSite/jQuery/unitegallery/skin-right-thumb.css" />

<script language="javascript" type="text/javascript">

$(document).ready(function() {
  $().SPServices({
    operation: "GetListItems",
    async: false,
    listName: "VideoList",
    CAMLViewFields: "<ViewFields></ViewFields>",
    completefunc: function (xData, Status) {
      $(xData.responseXML).SPFilterNode("z:row").each(function() {
var NewsTitle  = $(this).attr("ows_LinkTitle");
var NewsDec  = $(this).attr("ows_Description");
var NewsLink  = $(this).attr("ows_Link");
var NewsPic  = $(this).attr("ows_Image1");
var NewsPic2  = $(this).attr("ows_Image2");


        var liHtml11 = "<div data-type='youtube' data-title='" + NewsTitle + "' " + "data-description='" + NewsDec + "' "+ "data-thumb='" + NewsPic + "' "+ "data-image='" + "' " + NewsPic2 + "' " + "data-videoid='" + NewsLink + "' " + ">" + "</div>";


        $("#tasksUL4").append(liHtml11);
      });
    }
  });
});
</script>
<div id="tasksUL4" ></div>

<script type="text/javascript">

jQuery(document).ready(function(){

jQuery("#tasksUL4").unitegallery();

});

</script>

Simple. enjoy it !!

Tuesday, June 7, 2016

jQuery Accordion for SharePoint List

This is another simple Javascript using  jQuery Accordion for your SharePoint video Gallery. The Reason that I was using this Accordion, because of small space on my SharePoint Portal home page. but I have 5-6 YouTube videos to embed within small space. And I connected it  with SharePoint Custom List which My user able to add/remove Video's easily.
So I used this jQueryUI sample to solve my issue http://jqueryui.com/accordion/


Let's follow bellow simple steps,

1. create SharePoint list with two columns (Title, HTML)
2. Go to YouTube and enter your video to Sharepoint List
     Title: you can use YouTube Title
     HTML: copy and paste YouTube embed code

3. Download Jquery and SPServices (Or You can use their CDN)
4. Copy bellow code and save as TXT in your jQuey Library

<script type="text/javascript" src="../jQuery/jquery-1.12.3.min.js"></script>
<script type="text/javascript" src="../jQuery/jquery.SPServices-2014.02.js"></script>

<link rel="stylesheet" href="//code.jquery.com/ui/1.11.4/themes/smoothness/jquery-ui.css">
<script src="//code.jquery.com/ui/1.11.4/jquery-ui.js"></script>

<script language="javascript" type="text/javascript">

$(document).ready(function() {
  $().SPServices({
    operation: "GetListItems",
    async: false,
    listName: "Video",
    CAMLViewFields: "<ViewFields></ViewFields>",
    completefunc: function (xData, Status) {
      $(xData.responseXML).SPFilterNode("z:row").each(function() {
        var liHtml = "<h3>" + $(this).attr("ows_LinkTitle")+ "</h3>" + "<div>" +$(this).attr("ows_HTML")+ "</div>"  ;
$("#tasksUL2").append(liHtml);

      });
    }
  });
});
</script>
 <script>
  $(function() {
    $( "#tasksUL2" ).accordion();
  });
</script>

<ul id="tasksUL2"/>


4. Use CEWP and attache to TXT file.

Enjoy it !!

Tuesday, May 17, 2016

JavaScript Slider for SharePoint List


This is the simple Image Slider for your decoration your home page in SharePoint. I found nice JavaScript Slider here. What I did, I managed to Integrated using Jquery and SPservices

Download three of them. Create document library and upload it. 
create a Custom List call "MySlider" (You can name it as you wish, But make sure put correct name on Script). and Create 4 Columns 
Title, Description, Link (Link to External or Any Link), Image (Link to Image)
It's better you make same size images. In my case, I made 630*300


<script type="text/javascript" src="/Jscript/jquery-2.2.3.min.js"></script>
<script type="text/javascript" src="/Jscript/jquery.SPServices-2014.02.min.js"></script>
<script type="text/javascript" src="/Jscript/pgwslider.min.js"></SCRIPT>
<link rel="stylesheet" href="/Jscript/pgwslider.min.css" />

<script language="javascript" type="text/javascript">

$(document).ready(function() {
  $().SPServices({
    operation: "GetListItems",
    async: false,
    listName: "MySlider",

CAMLRowLimit: 4,
    CAMLViewFields: "<ViewFields></ViewFields>",
completefunc: function (xData, Status) {
      $(xData.responseXML).SPFilterNode("z:row").each(function() {
var NewsTitle  = $(this).attr("ows_LinkTitle");
var NewsDec  = $(this).attr("ows_Description");
var NewsLink  = $(this).attr("ows_Link");
var NewsPic  = $(this).attr("ows_Image");


        var liHtml1 = "<li><img src='"+ NewsPic +"'" + " " + "alt='"+ NewsTitle +"'" + " " + "data-description='"+ NewsDec +"'  />" + "<a href='" + NewsLink + "'/>" + "</li>";

        $("#tasksUL").append(liHtml1);
      });
    }
  });
});
</script>
<ul id="tasksUL" class="pgwSlider"/>

<SCRIPT type=text/javascript>
$(document).ready(function() {
    $('.pgwSlider').pgwSlider();
});
</script>


That's it. Less talk and big job !!
Enjoy It

Wednesday, April 6, 2016

Getting Computer Name of the System using JavaScript

This is not probably you want to do all the time. But One day I was looking for how to find host name in client PC for filling up their asset, they dont know how to find it. and I used this script to help them to make it easy

<!DOCTYPE html PUBLIC "-//W3C//DTD XHTML 1.0 Transitional//EN" "http://www.w3.org/TR/xhtml1/DTD/xhtml1-transitional.dtd">
<html xmlns="http://www.w3.org/1999/xhtml" >
    <head>
        <title>Computer Name</title>
        <script type="text/javascript">
            function getComputerName() {
                var WshNetwork = new ActiveXObject("WScript.Network");
                document.writeln("Computer Name = " + WshNetwork.ComputerName + "<br />");
            }
        </script>
    </head>
    <body onload="javascript: getComputerName()">

    </body>
</html>

Tuesday, April 5, 2016

Mapping a SharePoint Folder as a Drive

Steps to create a mapped drive:

Step 1: Open SharePoint online and find the Document Library you want to map a drive to.

Step 2: In the Document Library window under Library Tools click on Library

Step 3: Click on “Open With Explorer”


Step 4: When Windows Explorer opens highlight the URL in the Address Bar and Copy (Ctrl + C) that text


Step 5: Open a different Windows Explorer window (Windows Button + E)

Step 6: Right Click on Computer


Step 7: Click on Map Network Drive

Step 8: Choose a drive letter, best to have a consistent drive letter that everyone uses.

Step 9: Past the text copied in Step 4 into the Folder box

Step 10: Make sure Reconnect at Logon and Connect using different Credentials are checked


Step 11: Click on Finish

Step 12: Enter the username password you use to login to Office 365 SharePoint

Step 13: Make sure “Remember my Credentials” is checked

Step 14: Click on Ok

Step 15: Reboot your computer to make sure the mapped drive is still present

- See more at: http://www.summitgroupsoftware.com/blog/mapping-sharepoint-folder-drive#sthash.xeA08Ed6.dpuf